スイッチサイエンスで、PololuのVL53L0Xモジュールを購入してArduinoとESP32で試してみたメモです。
- スイッチサイエンスの商品ページ: Pololu VL53L0X Time-of-Flight 距離センサモジュール
- Pololuの製品ページ: VL53L0X Time-of-Flight Distance Sensor Carrier with Voltage Regulator, 200cm Max
- データシート
PololuのVL53L0Xモジュールのピンアサイン
Pololuのピンホールは7つあります。
| シルク | 説明 |
|---|---|
| VDD | 電源 |
| VIN | 主電源 (基本こちらを使う) |
| GND | グランド |
| SDA | I2Cのシリアルデータ |
| SCL | I2Cのシリアルクロック |
| XSHOT | ハードウェアスタンバイ |
| GP01 | ??? |
まず、電源VDDとVINですが、VDDは以下のように、VL53L0XのVDDにつながっています。
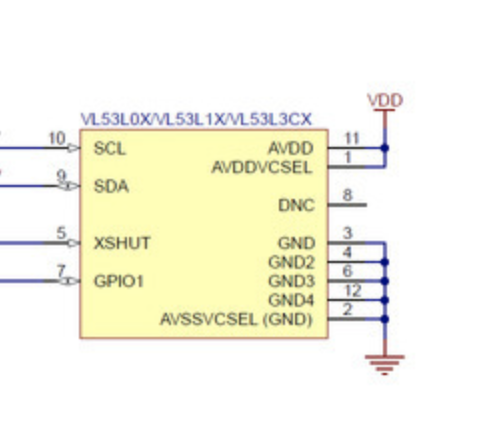
VINは、電圧レギューレータv2.0 LDOが2.6 V〜5.5 Vの入力電圧をv2.8に変換してVDDに電源を供給してくれます。v2.8の電圧を別回路で用意して直接VDDに電源を供給したい場合以外はこちらを使います。

VL53L0Xとの通信はI2Cで行います。SDAはシリアルデータ、SCLはシリアルクロックです。
XSHOTは、LOWを入力するとハードウェアスタンバイに入ります。
GP01については、データシートの記載に依ると、センサーの値に変化があった場合に何かしたいときに使える用です。(API ユーザマニュアルを軽くみてみましたがよくわからず)
2.7 Getting the data: interrupt or polling
User can get the final data using a polling or an interrupt mechanism.
Polling mode: user has to check the status of the ongoing measurement by polling an API function.
Interrupt mode: An interrupt pin (GPIO1) sends an interrupt to the host when a new measurement is available.
The description of these 2 modes is available in the VL53L0X API User Manual.
Arduino
Frintzingの実践図のモジュールはPololuのものではないですが、以下のように配線します。
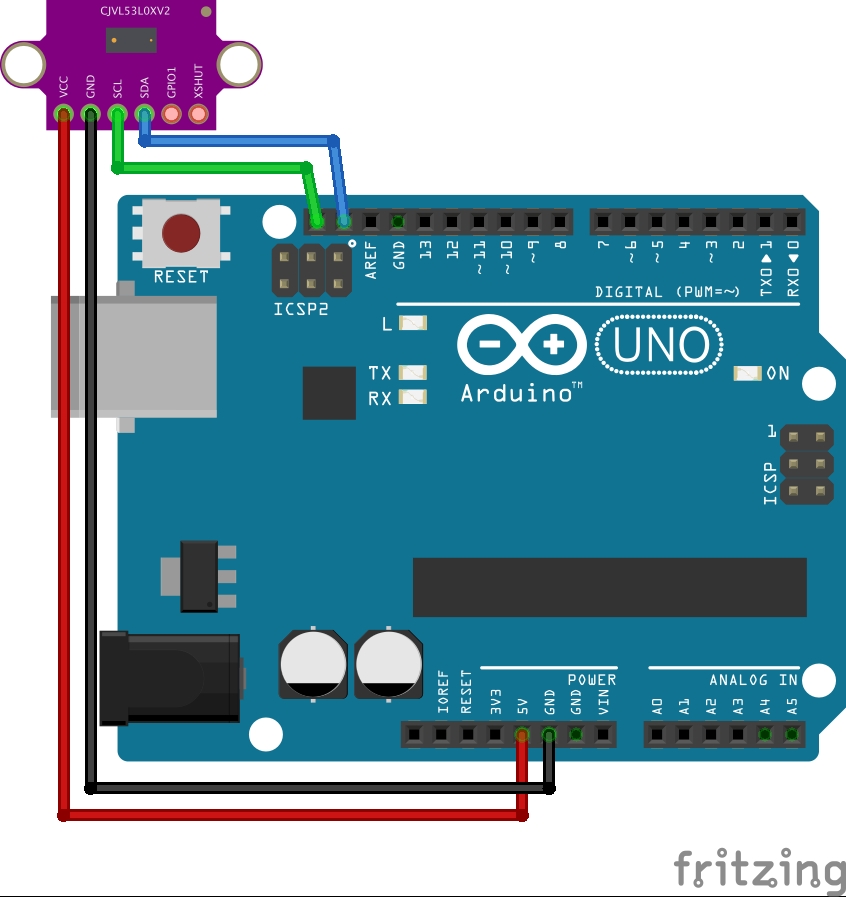
実際に配線した写真

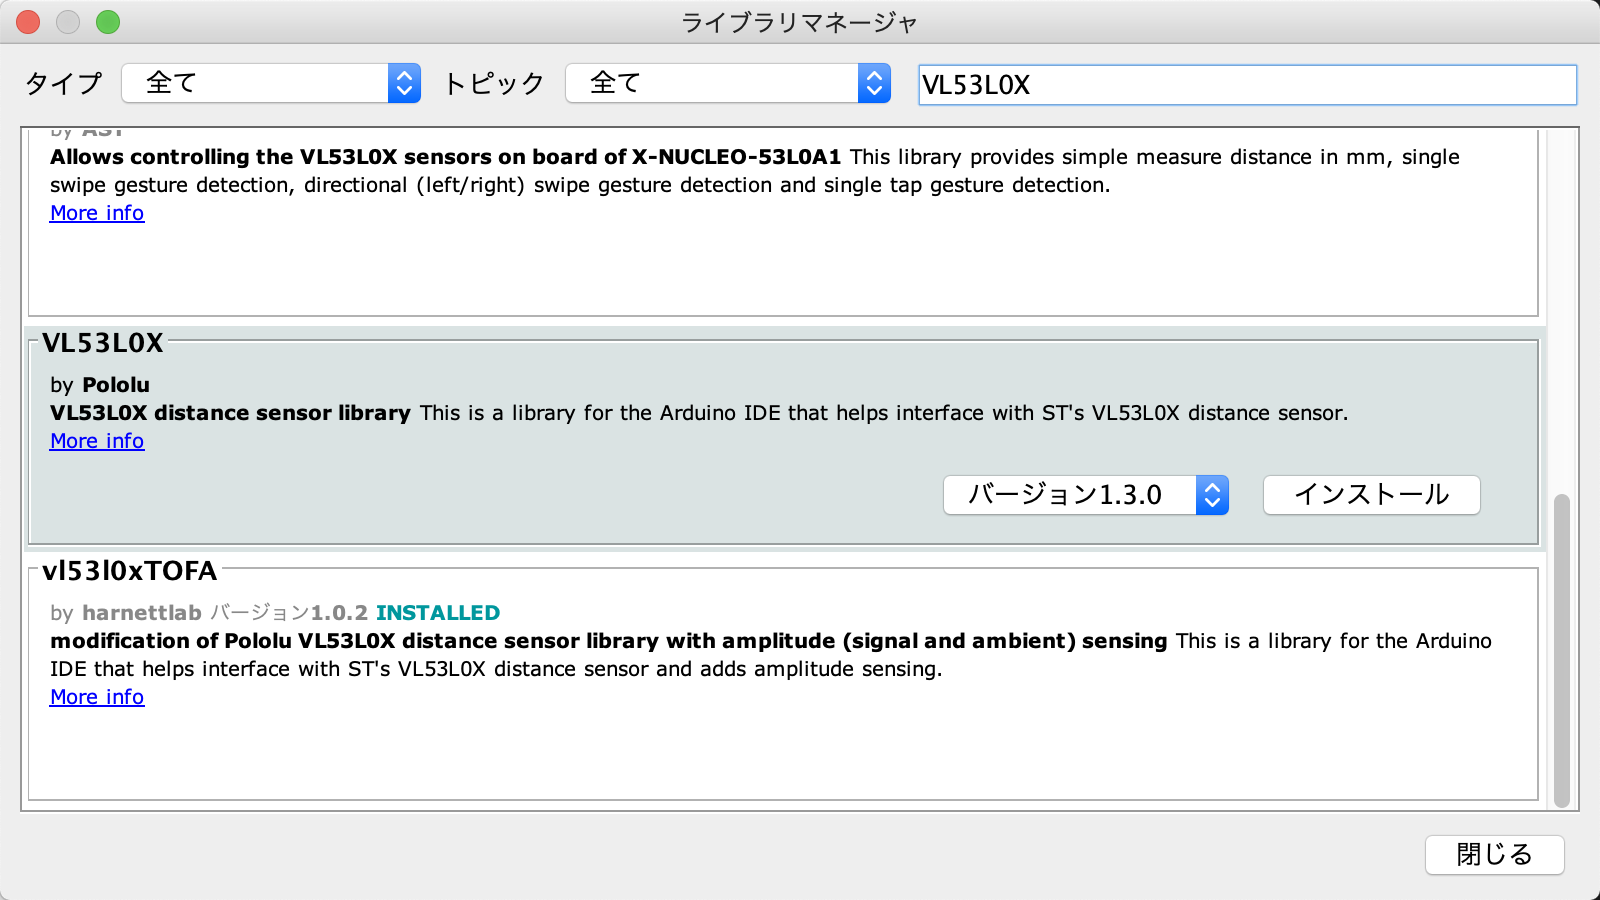
ライブラリは「VL53L0X by Pololu」を利用します。
ライブラリマネージャで「VL53L0X」でフィルターしてインストールします。
以下、スケッチ例です。公式のContinuous.inoをベースにしています。
#include <Wire.h>
#include <VL53L0X.h>

VL53L0X sensor;

void setup()
{
  Serial.begin(9600);
  //I2C通信ライブラリ(Wire)の初期化
  Wire.begin();

  //タイムアウトまでの時間をセット
  sensor.setTimeout(500);
  //距離センサ(VL53L0X)の初期化
  if (!sensor.init())
  {
    Serial.println("Failed to detect and initialize sensor!");
    while (1) {}
  }

  // Start continuous back-to-back mode (take readings as
  // fast as possible).  To use continuous timed mode
  // instead, provide a desired inter-measurement period in
  // ms (e.g. sensor.startContinuous(100)).
  sensor.startContinuous();
}

void loop()
{
  Serial.print(sensor.readRangeContinuousMillimeters());
  // タイムアウトが起きた場合はタイムアウトが起きたことを出力
  if (sensor.timeoutOccurred()) { Serial.print(" TIMEOUT"); }

  Serial.println();

  delay(1000);
}
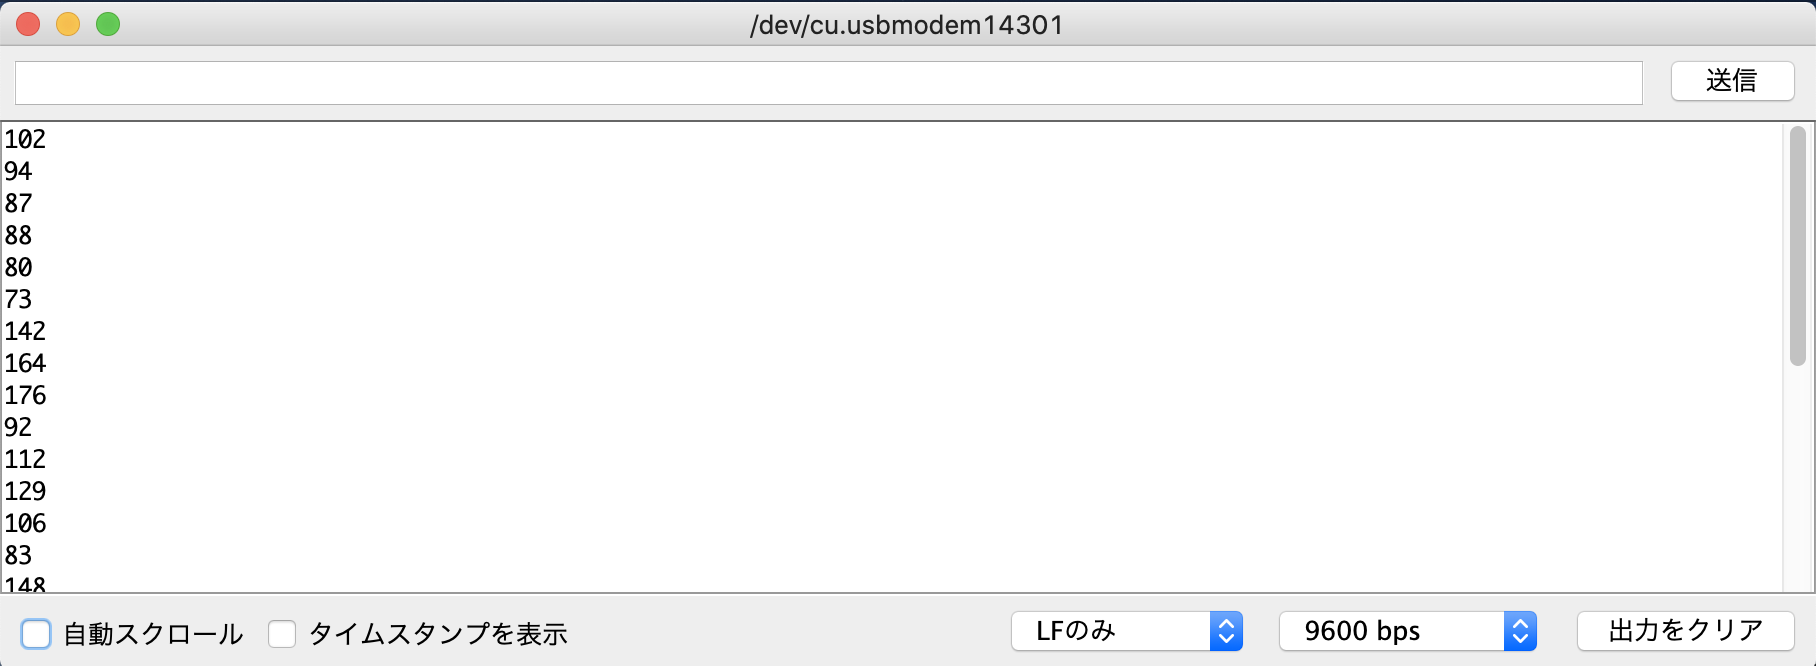
シリアルモニタで確認
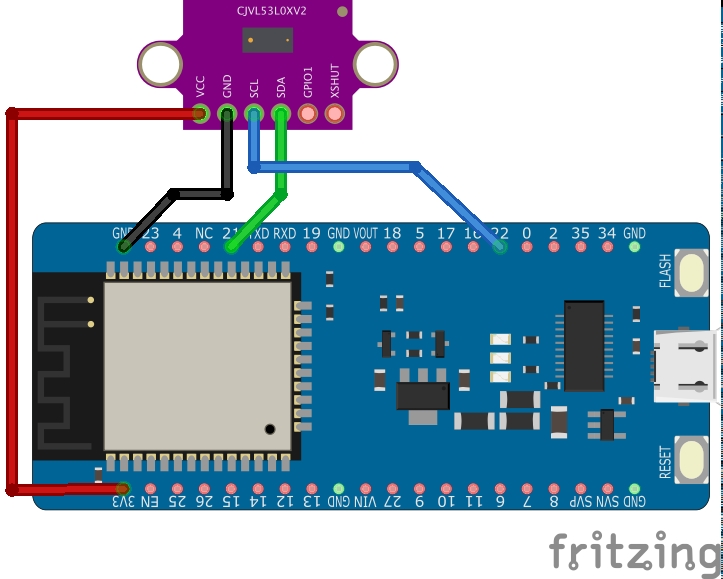
ESP32
ESP32のI2C用のピンはSDAが21、SCLが22です。
ESPr Developer 32の場合は以下のように配線します。
スケッチは、Wireライブラリの初期化を除いてArduinoと同じです。
IO21およびIO22版ピンは定数として定義されていて、I2C通信の初期化で Wire.begin(SDA, SCL); の様に指定できます。
参考: https://github.com/espressif/arduino-esp32/blob/master/variants/nano32/pins_arduino.h
#include <Wire.h>
#include <VL53L0X.h>

VL53L0X sensor;

void setup()
{
  Serial.begin(9600);
  //I2C通信ライブラリ(Wire)の初期化
  Wire.begin(SDA, SCL);

  sensor.setTimeout(500);
  if (!sensor.init())
  {
    Serial.println("Failed to detect and initialize sensor!");
    while (1) {}
  }

  sensor.startContinuous();
}

void loop()
{
  Serial.print(sensor.readRangeContinuousMillimeters());

  if (sensor.timeoutOccurred()) { Serial.print(" TIMEOUT"); }

  Serial.println();

  delay(1000);
}