以前から触ってみようと思ってやっていなかったIoTデータを可視化するサービスAmbientを試してみました。
使い方は、書籍「IoT開発スタートブック ── ESP32でクラウドにつなげる電子工作をはじめよう!」やAmbientの公式ドキュメントに詳しく書かれていますが、試した内容をメモとして残しておきます。
Githubリポジトリ ESP8266/ESP32用Arduino・Ambientライブラリー にもサンプルが掲載されているのでこちらも参考になります。
センサーは、M5Stick-C ENV III Unitを使います。

Ambientのアカウント作成とチャンネルの作成
Ambientのアカウントをお持ちでない方は、https://ambidata.io/にアクセスしてアカウントを作成してログインしてください。
[チャンネル一覧]を表示して[チャンネルを作る]ボタンをクリックして新しいチャンネルを作成します。
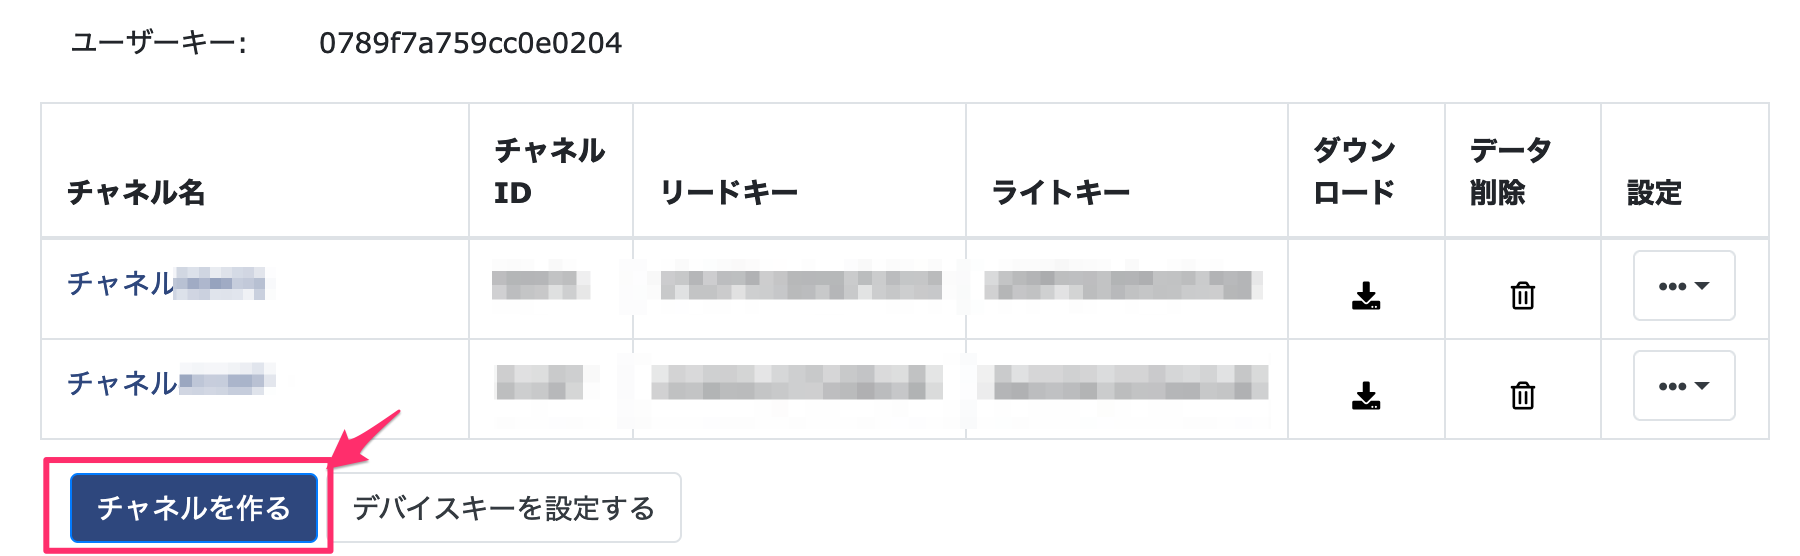
作成されたチャンネルの「チャンネルID」と「ライトキー」は、Ambientにデータを送信する際に使用します。
Arduino IDEに必要なライブラリを追加
M5Stackのボードマネージャはセットアップ済みとして、Ambientのライブラリをインストールします。
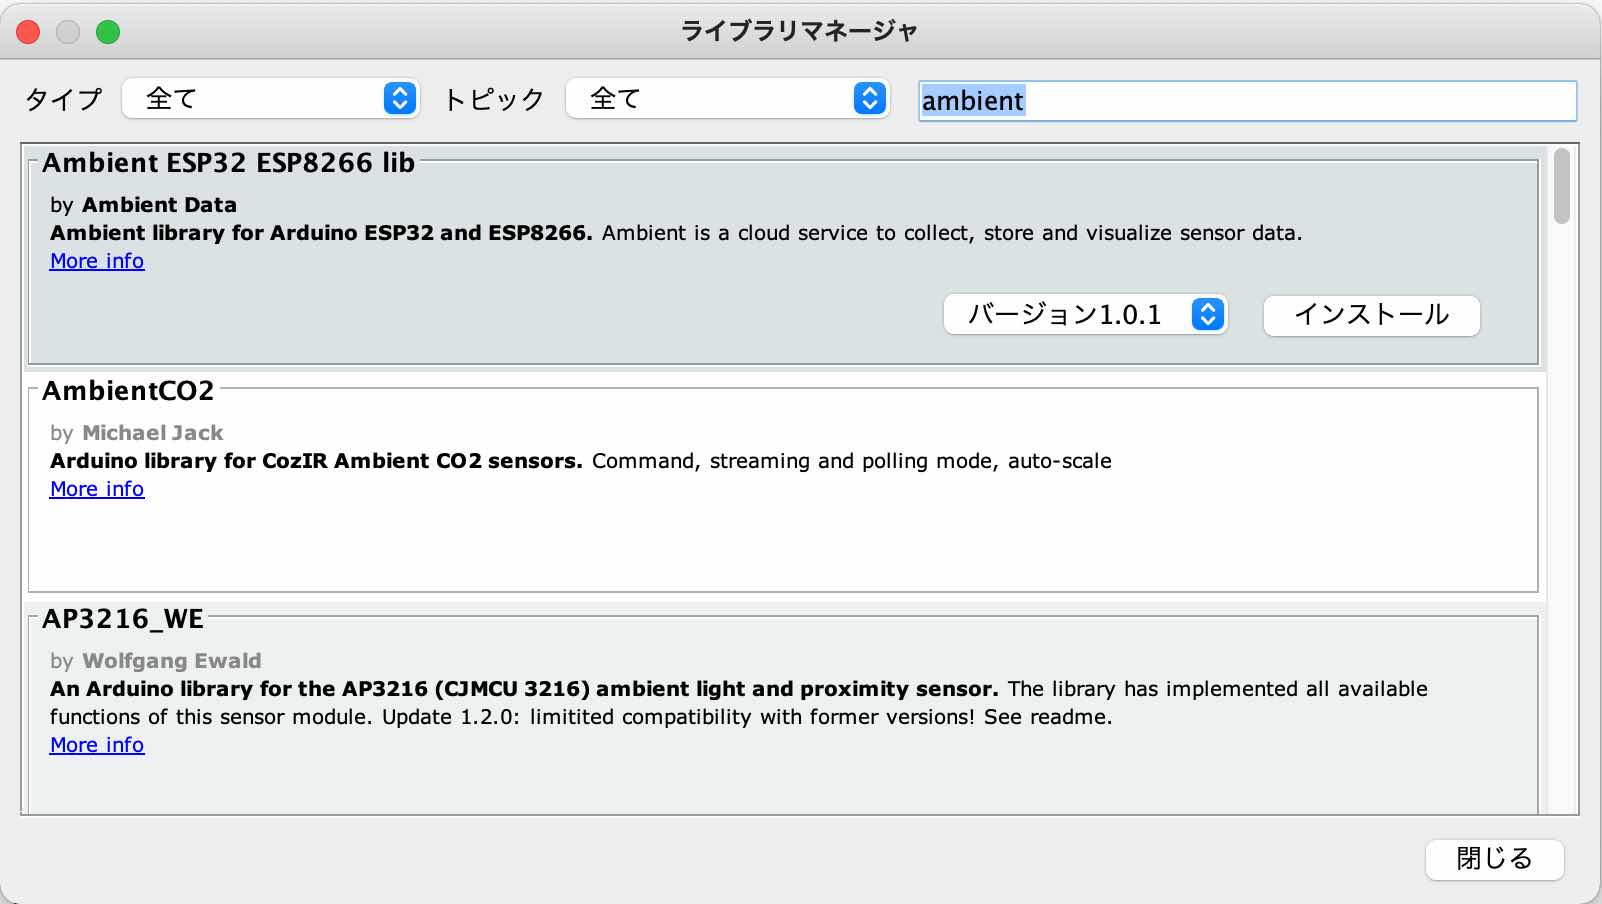
Arduino IDEのメニューから[ツール] > [ライブラリを管理…]を選択してライブラリマネージャを開き、右上のフィルターに「ambient」を入力します。
「Ambient ESP32 ESP8266 lib」をインストールします。
スケッチ
スケッチは、公式サンプルのリポジトリ m5stack / UNIT_ENV に公開されているソースを使います。
前回の記事「M5Stack ENV III Unit 温湿度気圧センサ (SHT30+QMP6988) の使い方」を参考に、ソースをAdruino IDEに読み込んでください。
ENV3_SHT30_QMP6988.inoにAmbientにデータを送信する処理を追加します。
Ambient用の追加箇所はコメントを参考にしてください。
/*
*******************************************************************************
* Copyright (c) 2021 by M5Stack
*                  Equipped with M5StickC sample source code
*                          配套  M5StickC 示例源代码
* Visit the website for more information:https://docs.m5stack.com/en/core/m5stickc
* 获取更多资料请访问:https://docs.m5stack.com/zh_CN/core/m5stickc
*
* describe:ENVIII_SHT30_QMP6988.  环境传感器
* date:2021/8/17
*******************************************************************************
  Please connect to Port,Read temperature, humidity and atmospheric pressure and display them on the display screen
  请连接端口,读取温度、湿度和大气压强并在显示屏上显示
*/
#include <M5StickC.h>
#include "Adafruit_Sensor.h"
#include <Adafruit_BMP280.h>
#include "UNIT_ENV.h"

// AmbientとWIFIライブラリの読み込みとログイン情報を定義 ここから
#include <Ambient.h>
#include <WiFi.h>

const char* ssid = "your ssid";
const char* password = "your password";

WiFiClient client;
Ambient ambient;

unsigned int channelId = 99999;
const char* writeKey = "xxxxxxxxxxxxxxx";
// AmbientとWIFIライブラリの読み込みとログイン情報を定義 ここまで

SHT3X sht30;
QMP6988 qmp6988;

float tmp = 0.0;
float hum = 0.0;
float pressure = 0.0;

void setup() {
  M5.begin(); //Init M5StickC.  初始化M5StickC
  M5.Lcd.setRotation(3);  //Rotate the screen.  旋转屏幕
  Wire.begin(); //Wire init, adding the I2C bus.  Wire初始化, 加入i2c总线
  qmp6988.init();
  M5.lcd.println(F("ENV Unit III test"));

  // WIFIとAmbientクライアントの初期化 ここから
  WiFi.begin(ssid, password);
  while (WiFi.status() != WL_CONNECTED) {  //  Wi-Fiアクセスポイントへの接続待ち
    delay(500);
    Serial.print(".");
  }
  Serial.println("Wifi connected");
  ambient.begin(channelId, writeKey, &client);  //  チャネルIDとライトキーを指定してAmbientの初期化
  // WIFIとAmbientクライアントの初期化 ここまで
}

void loop() {
  pressure = qmp6988.calcPressure();
  if(sht30.get()==0){ //Obtain the data of shT30.  获取sht30的数据
    tmp = sht30.cTemp;  //Store the temperature obtained from shT30.  将sht30获取到的温度存储
    hum = sht30.humidity; //Store the humidity obtained from the SHT30.  将sht30获取到的湿度存储
  }else{
    tmp=0,hum=0;
  }
  Serial.println(pressure);
  M5.lcd.fillRect(0,20,100,60,BLACK); //Fill the screen with black (to clear the screen).  将屏幕填充黑色(用来清屏)
  M5.lcd.setCursor(0,20);
  M5.Lcd.printf("Temp: %2.1f  \r\nHumi: %2.0f%%  \r\nPressure:%2.0fPa\r\n", tmp, hum, pressure);

  // Ambientに気温、湿度、気圧を送信 ここから
  ambient.set(1, tmp);
  ambient.set(2, hum);
  ambient.set(3, pressure);
  ambient.send();
  // Ambientに気温、湿度、気圧を送信 ここまで

  // Ambientの3000件/日の制限を超えないようにスリープ
  delay(30 * 1000);
}
ところで、諸元/制限 – Ambientによると、1チャンネルごとに送信可能なデータは3000件/日です。それを超えないように間隔を開けています。
1チャネルあたり1日3,000件までデーターを登録できます。平均すると28.8秒に1回のペースです。
ambientのグラフを確認
スケッチを書き込んでしばらくすると、ambientで受信したデータをグラフで確認できます。
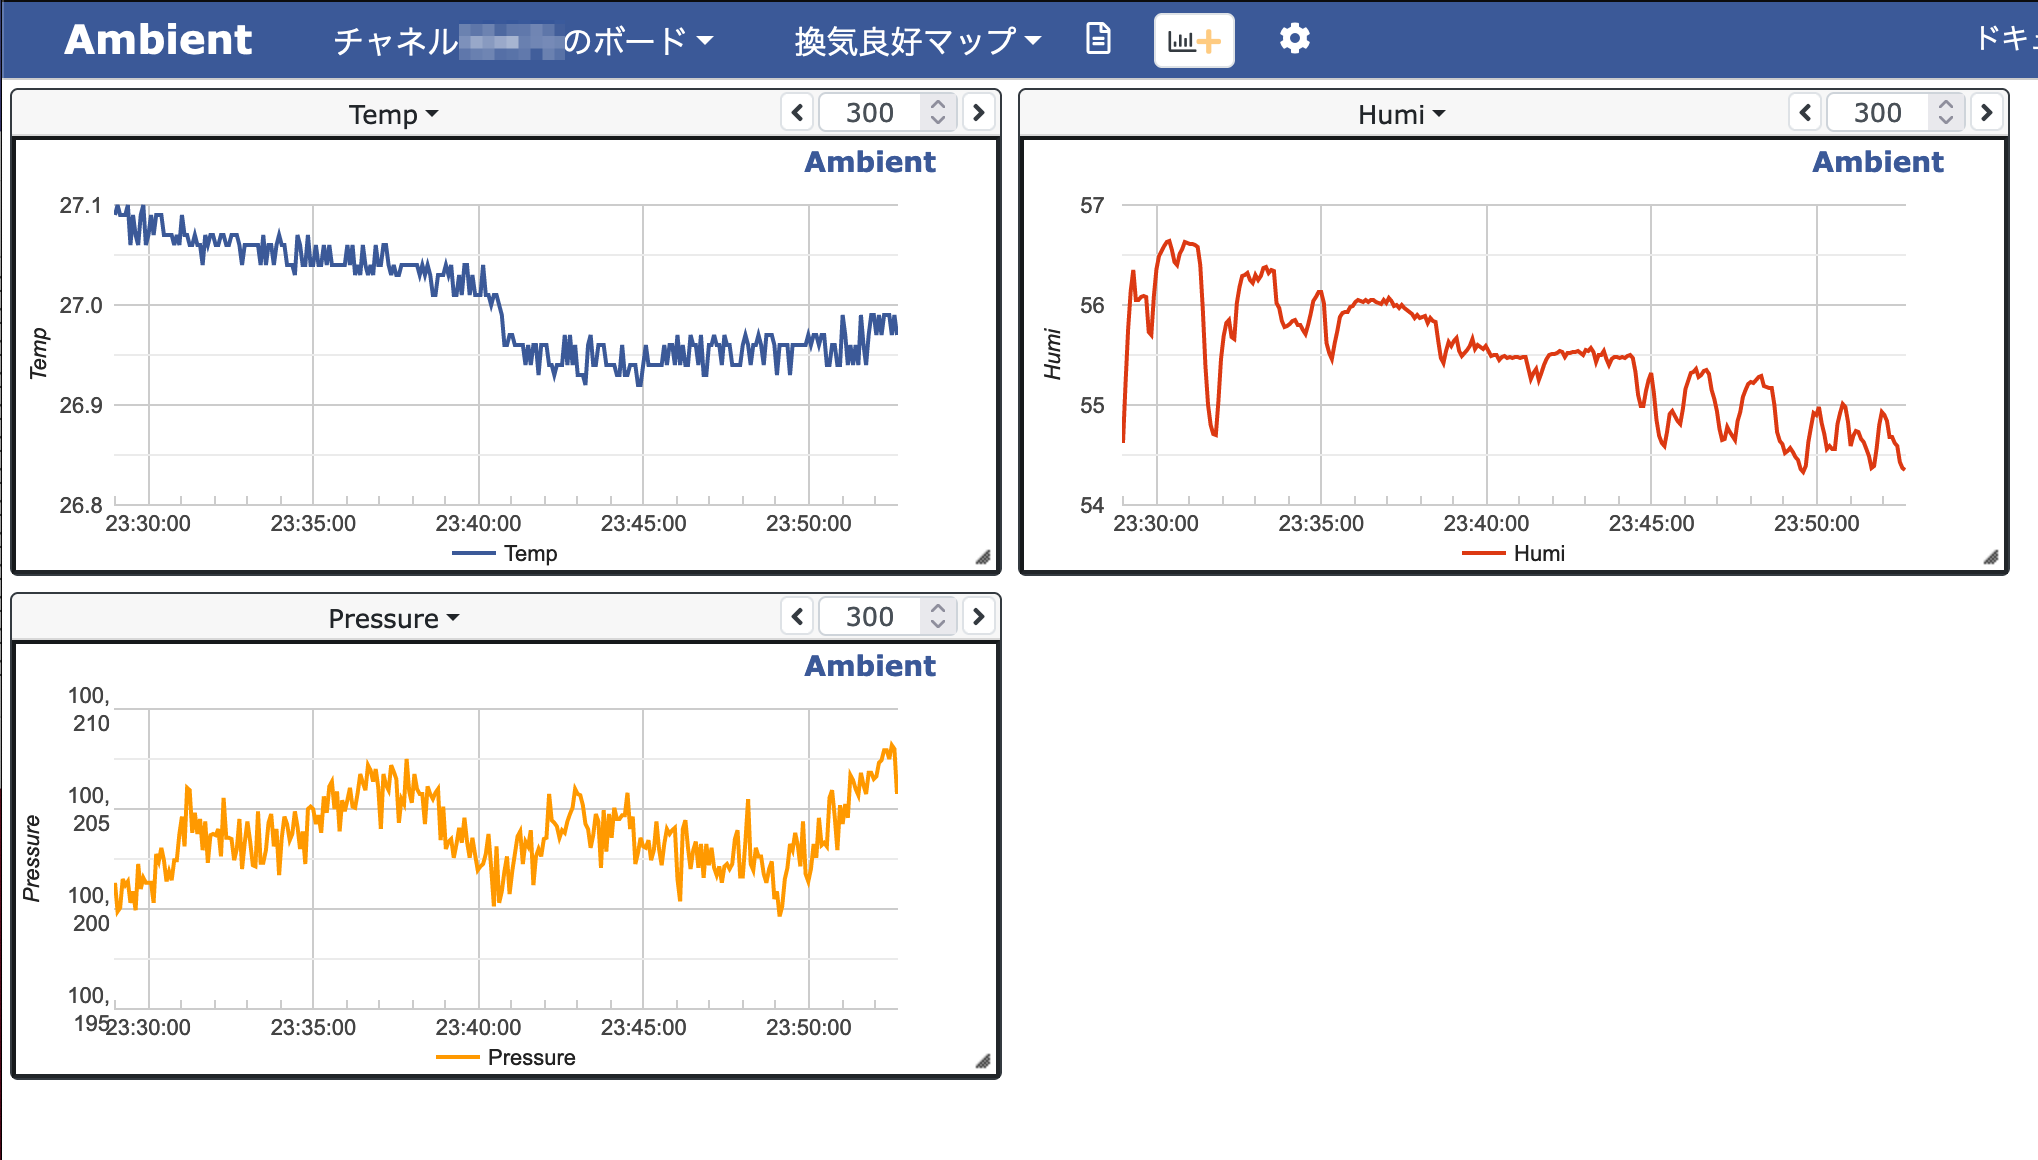
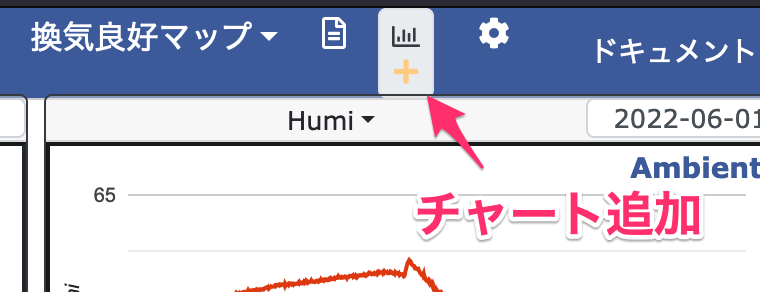
チャンネルのグラフはデフォルトだと2つなので、以下のボタンからチャートを追加して設定しています。
(チャートの追加方法がわかりにくい。。)